Everything you need to run MintEncoder.
Setup, licensing workflow, key management and certificates.
On this page
Installation
MintEncoder runs as a standalone Windows desktop application. No server, database, or internet connection is required to install or operate it.
- Download the installer from the Downloads page.
- Verify the SHA256 checksum against the value published on that page.
- Run the installer and launch MintEncoder.
System requirements
- Windows 10 or later (64-bit)
- 200 MB free disk space
- No internet connection required for day-to-day use. It is needed for two specific things: confirming the Recovery Email when first setting up the Administrator Lock (the lock cannot activate without this), and requesting a recovery code if the password is later forgotten. The local vendor-support fallback for clearing the lock does not need it.
Navigation Panel
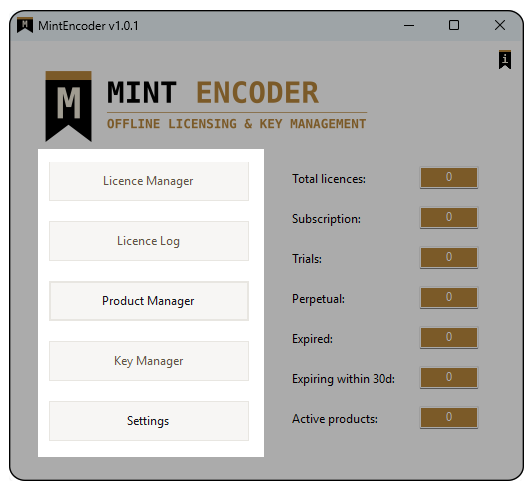
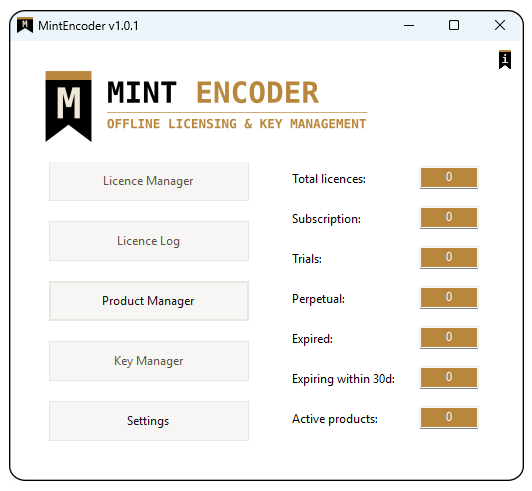
The Navigation Panel provides access to MintEncoder’s five core functions.
- Licence Manager
- Licence Log
- Product Manager
- Key Manager
- Settings
Product Manager
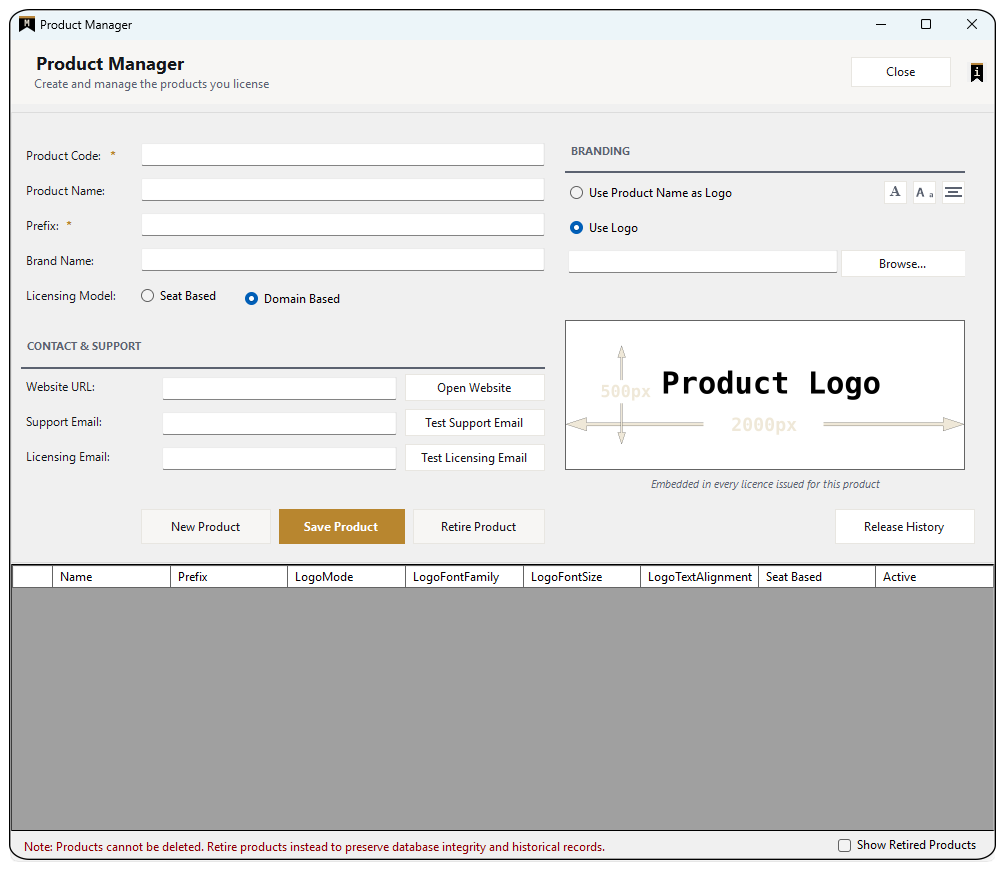
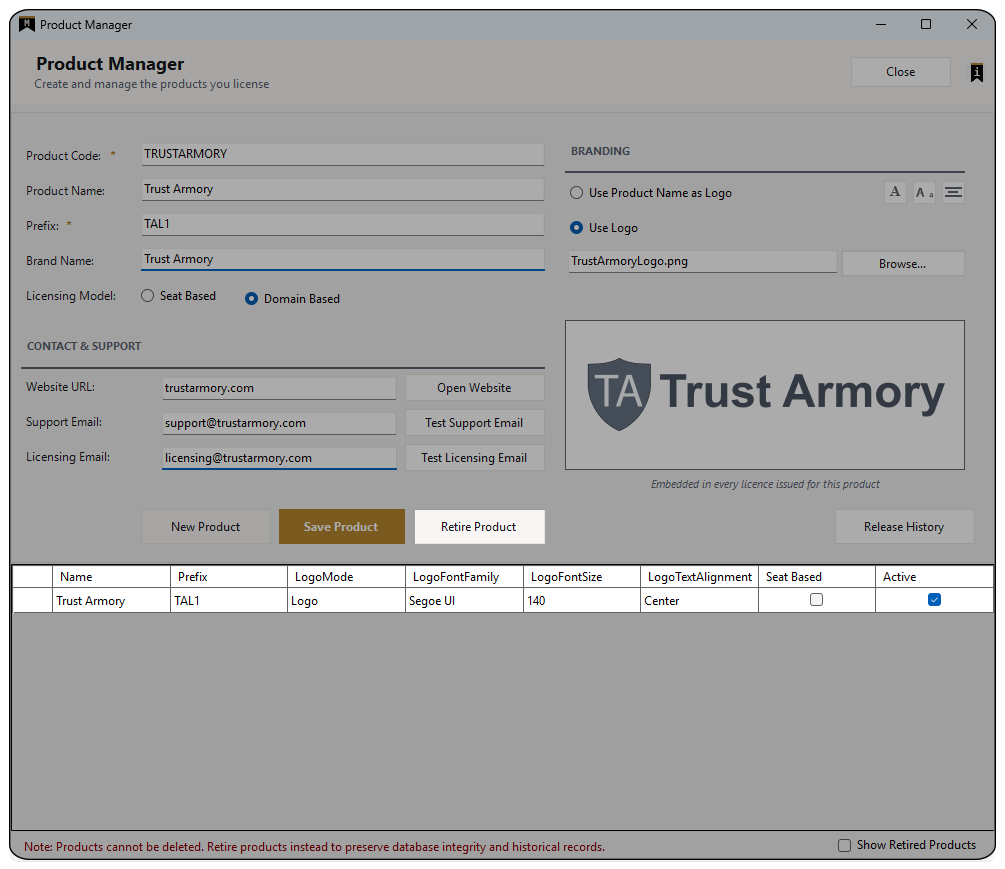
Product Manager is where you define what you’re selling, before any licence can be issued against it.
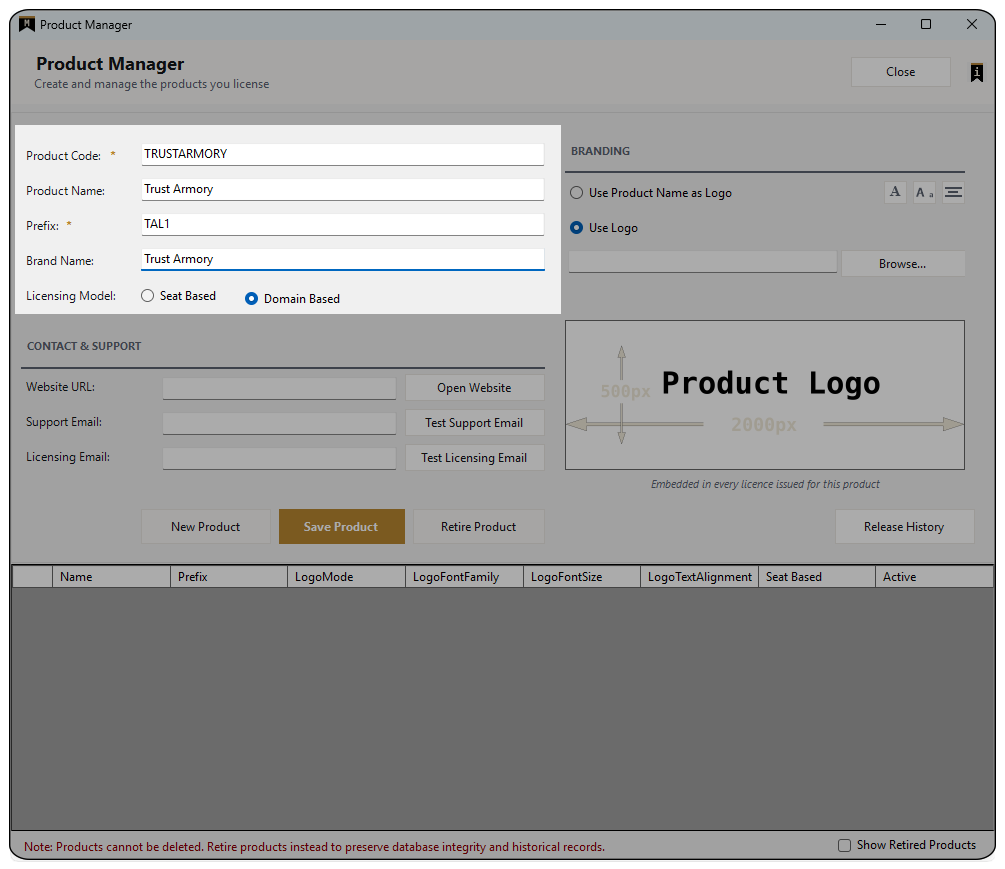
Throughout this help guide we will add our first product which is called Trust Armory. This is a plugin for wordpress so it will be a domain based licensing model. This means that the licence will only be valid on the domain specified in the licence.
Product Details
Contains:
- Product Code
- Product Name
- Prefix
- Brand Name
- Licensing Model
Product Code & Prefix
The Product Code uniquely identifies the product within MintEncoder.
The Prefix is embedded into every licence generated for the product and is validated during activation. This value forms part of the product’s identity and should not be changed once licences have been issued.
Licensing Model
Choose one of the following licensing models:
Seat Based
Licences are assigned to a specific number of installations.
Designed for desktop applications.
Does not validate against a customer domain.
Customer Domain field is disabled.
Domain Based
Licences are associated with a domain or website.
Designed for websites and web applications.
Licence is valid only for the specified domain.
Customer Domain is required.
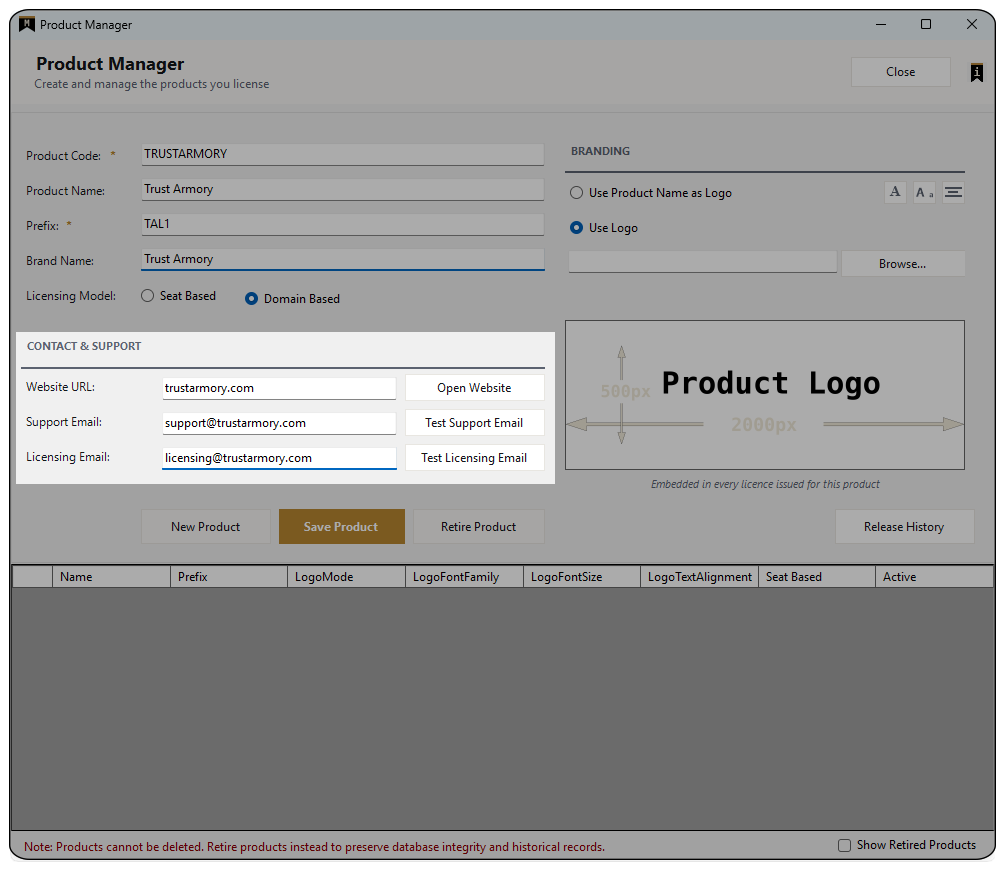
Contact & Support
The Contact & Support section stores the contact information associated with the product.
Fields include:
- Website URL
- Support Email
- Licensing Email
Fields include:
- Open Website opens the configured website URL.
- Test Support Email validates the support email address.
- Test Licensing Email validates the licensing contact address.
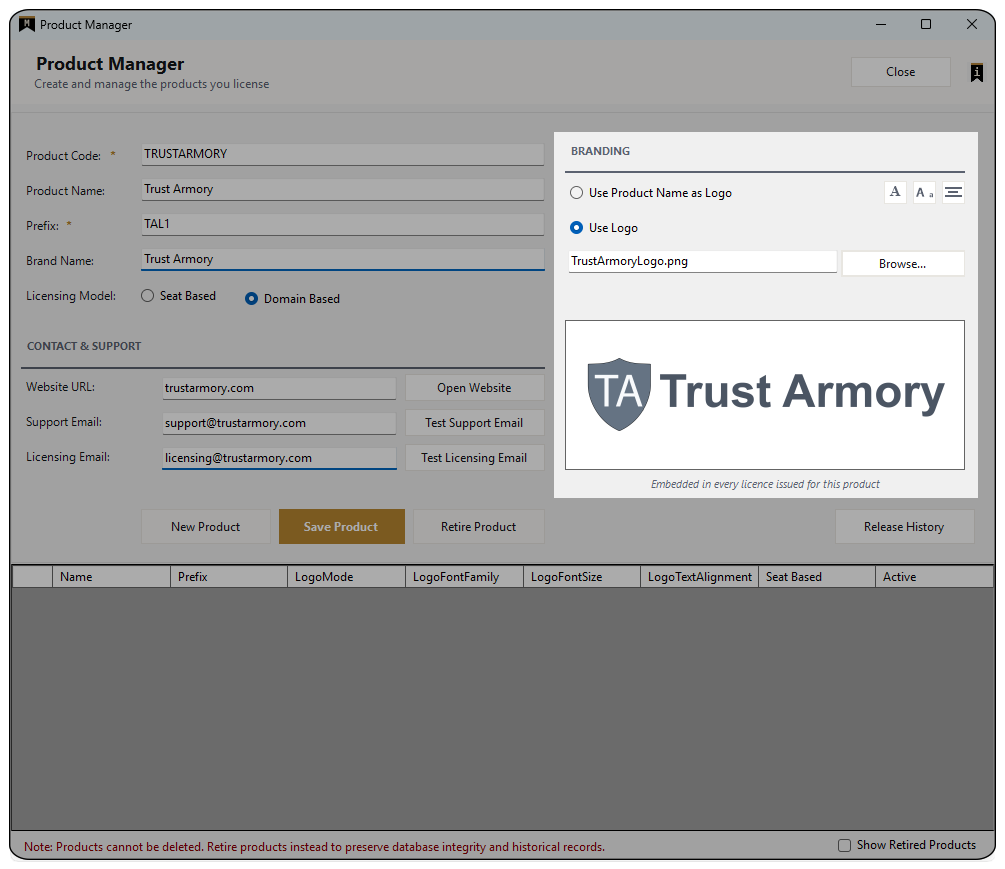
Branding - With Logo
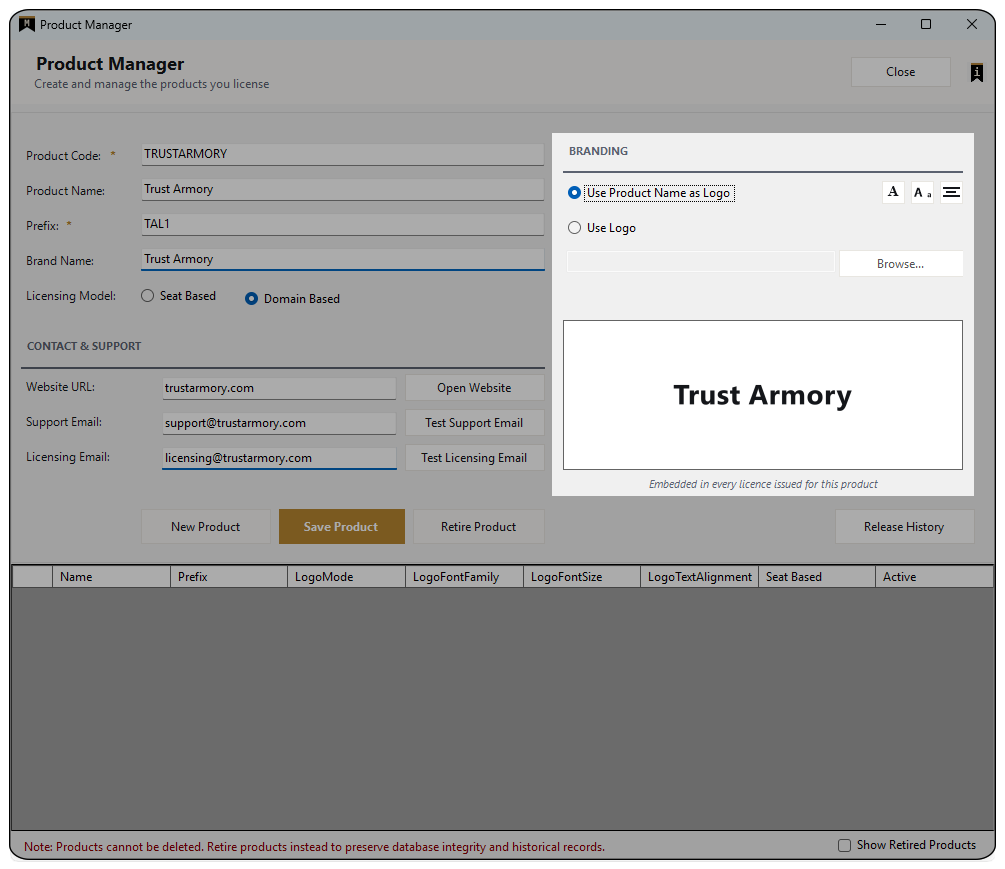
The Branding section allows a product-specific logo to be assigned. If no logo is specified, the default placeholder logo is used.
This logo is displayed throughout MintEncoder, including:
- The selected product banner in Licence Manager
- Generated licence certificates
- Product-related emails
- Other branded output produced by MintEncoder
For best results, use an image approximately 2000 × 500 pixels.
Tip: The Browse button opens the default image folder (MintEncoder\Images). This location can be changed via the Settings → System Tab.
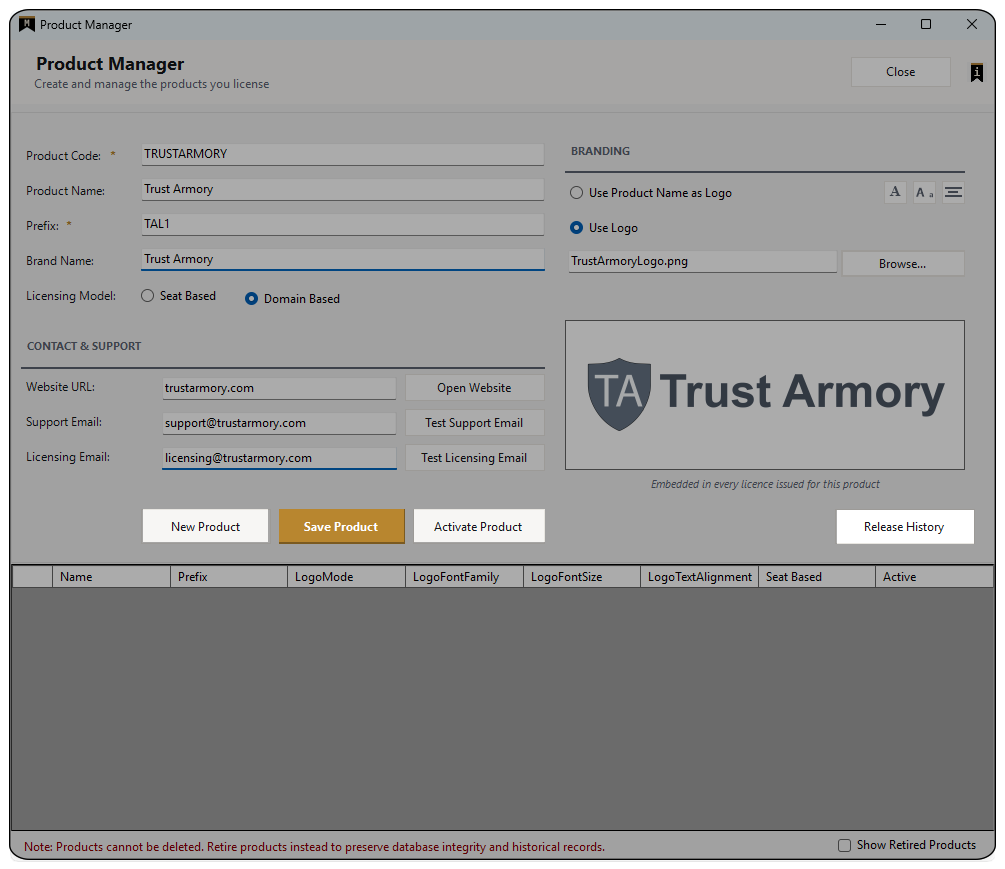
Product Action Buttons
The Product Actions section contains the controls used to create, update, retire, and manage products.
New Product
Clears the current form and prepares the Product Manager for the creation of a new product.
Save Product
Saves the current product and any changes made to its configuration.
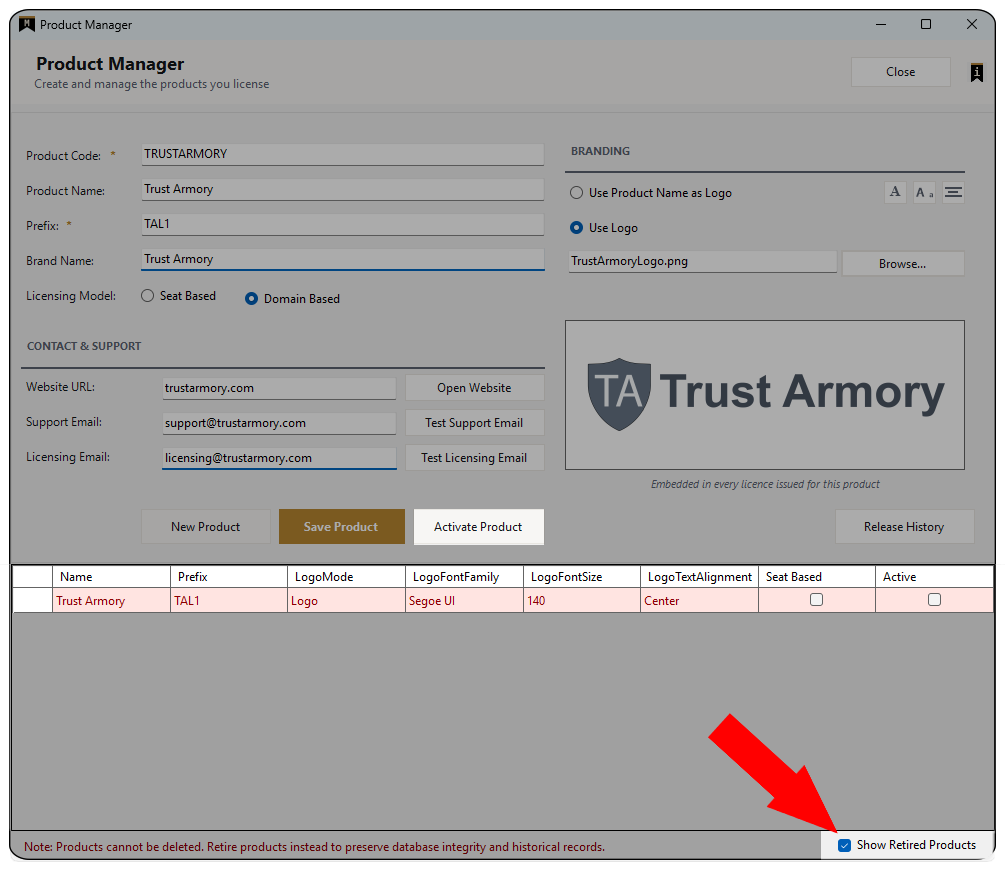
Activate Product (If the selected product is Retired)
Marks the product as active while preserving all associated licence and historical data.
Retire Product (If the selected product is Active)
Marks the product as inactive while preserving all associated licence and historical data.
Products cannot be deleted. Retiring a product preserves database integrity and historical licence records.
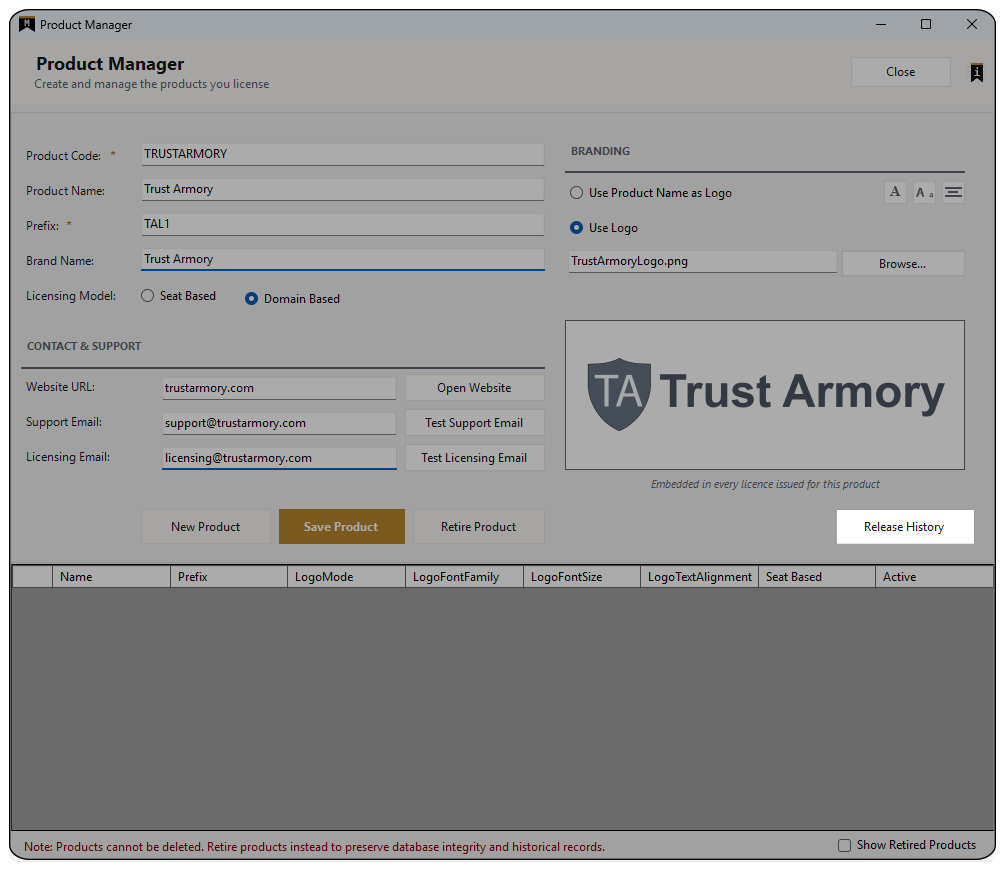
Release History
Opens the Release History editor for the selected product. The Release History allows version information and release notes to be maintained for a product. This information can be referenced during licence generation and provides a record of product releases over time.
Retired Product
When the selected product is retired, the third action button will change to “Activate Product”.
When a product is retired, the product row is coloured red and the row is hidden by default.
To view hidden products, click the “Show Retired Products” checkbox at the bottom of the page.
Release History
The Release History can only be access via the Product Manager page.
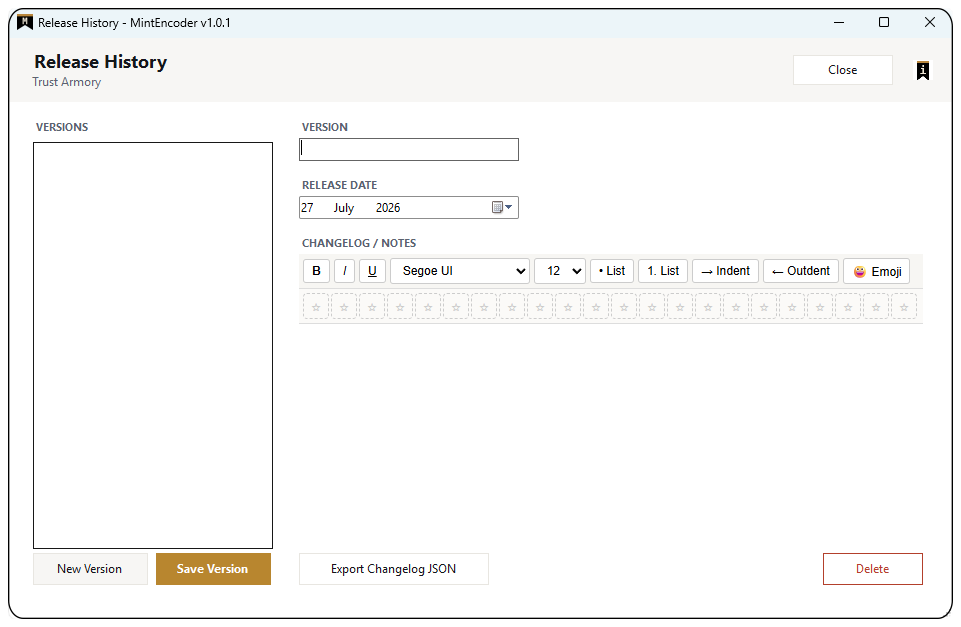
The Release History window provides a central record of product versions and release notes for the selected product.
Each release entry consists of:
Version
The product version number.
Release Date
The date the version was released.
Changelog / Notes
Details of new features, improvements, bug fixes, and other release information.
Version Control Explained
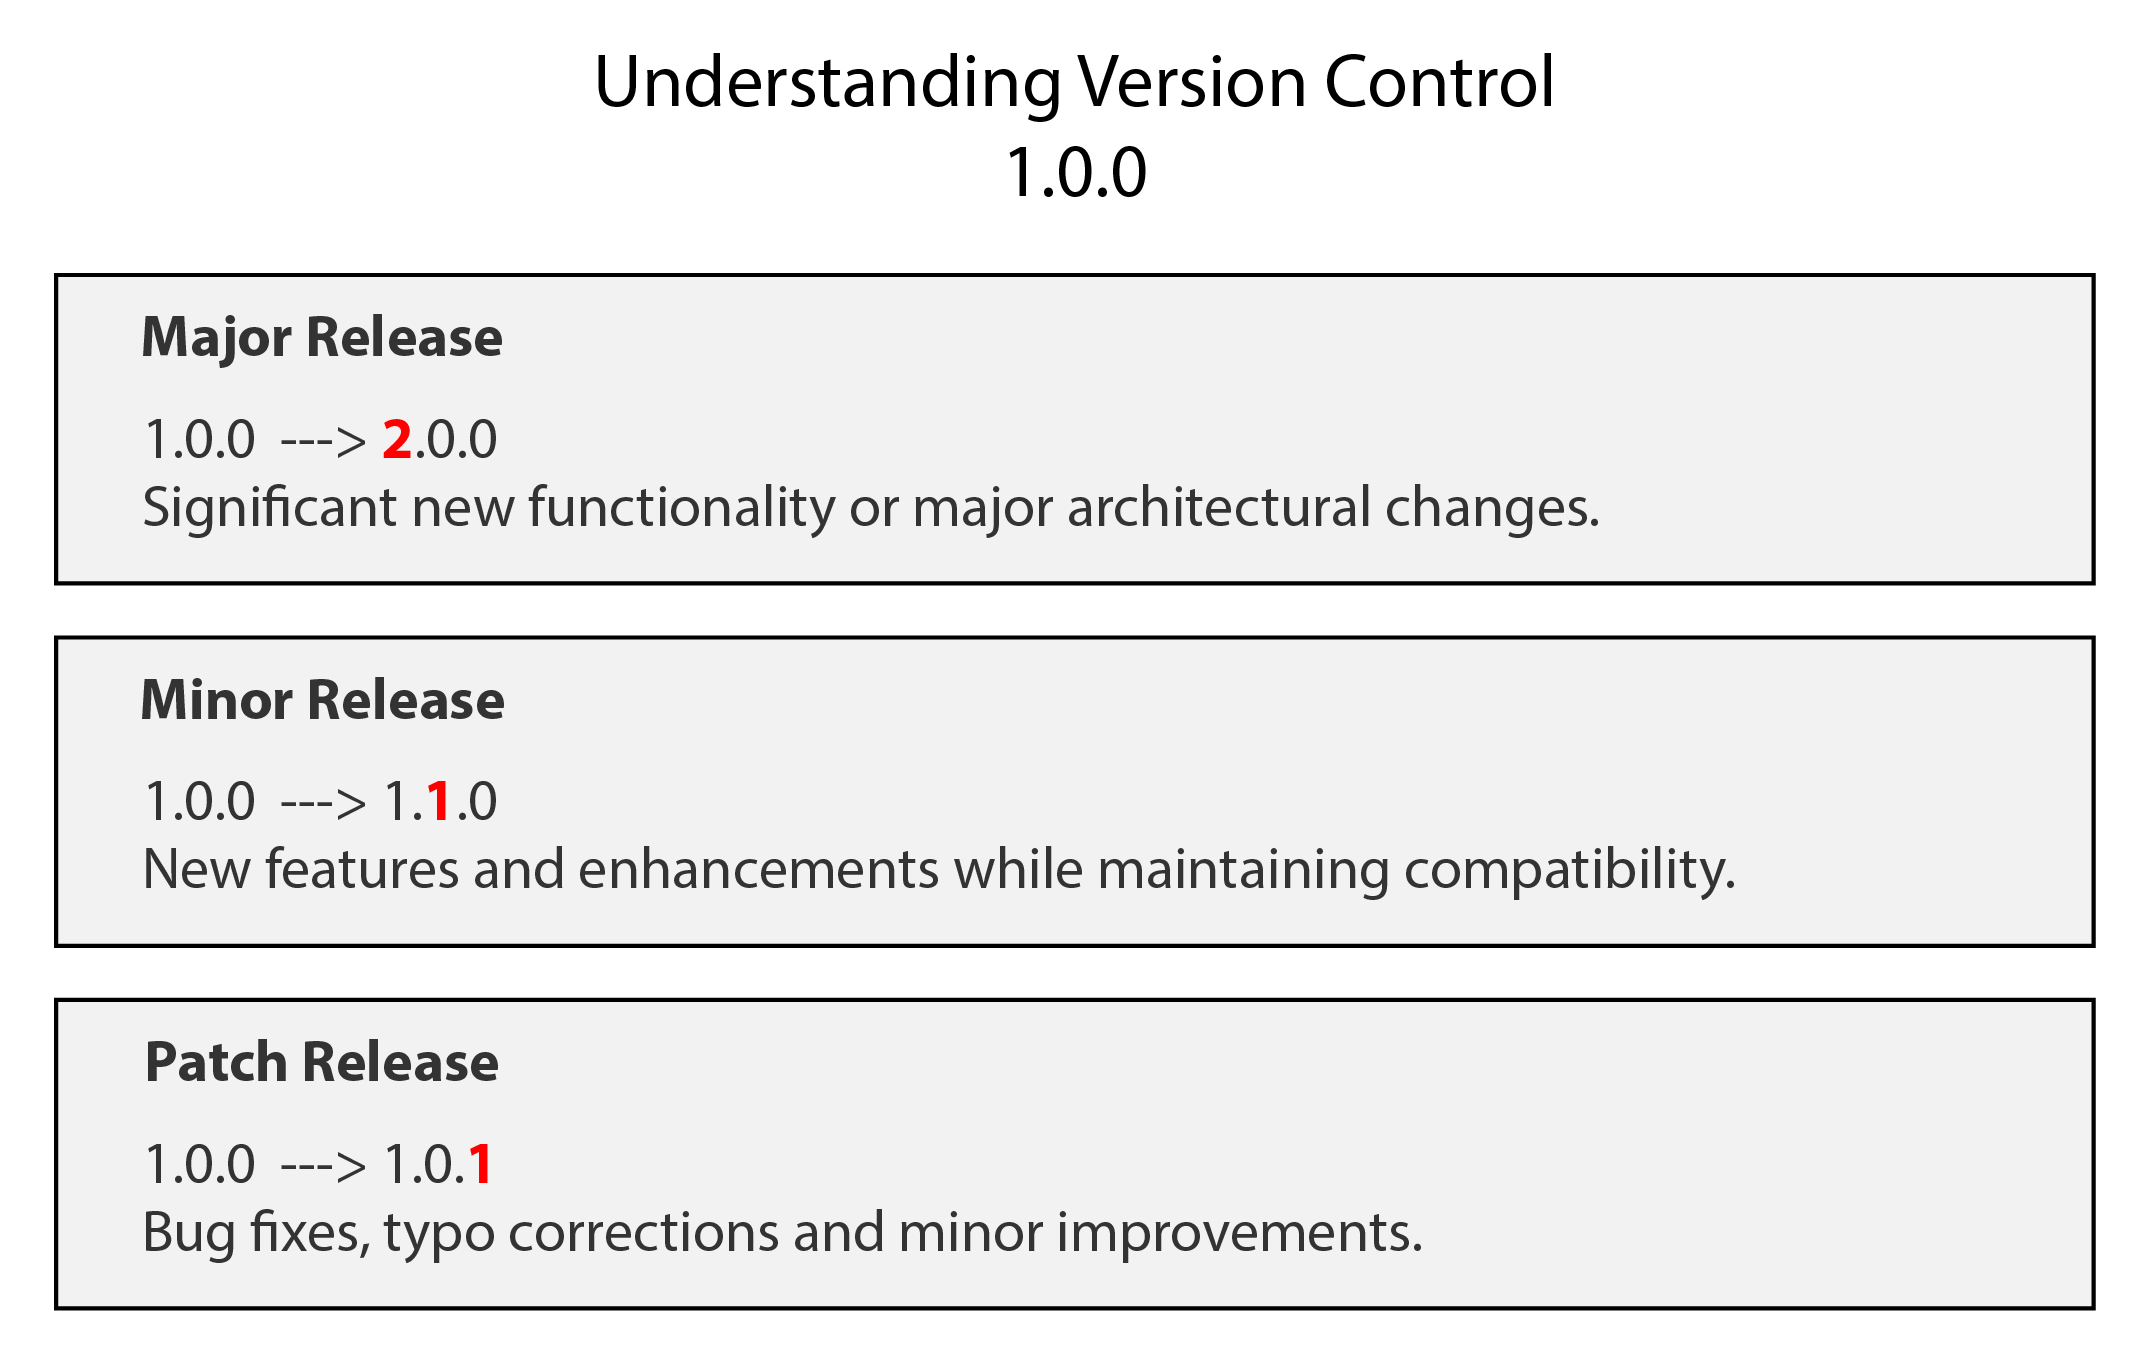
Product versions are recorded using a Major.Minor.Patch format, such as 1.0.0.
A Major Release
The first digit increments for a significant new release - this would reset the second and third digits to zero.
e.g. 1.6.3 ---> 2.0.0
A Minor Release
The second digit increments for new features and enhancements. This would reset the third digit to zero.
e.g. 1.6.3 ---> 1.7.0
A Patch Release
The third digit increments for bug fixes or minor corrections.
e.g. 1.6.3 ---> 1.6.4
Consistent version numbering provides a clear record of product development and helps customers identify the changes included in each release.
Release New Version
The Release Version Manager is only accessible via the active Product in Product Manager.
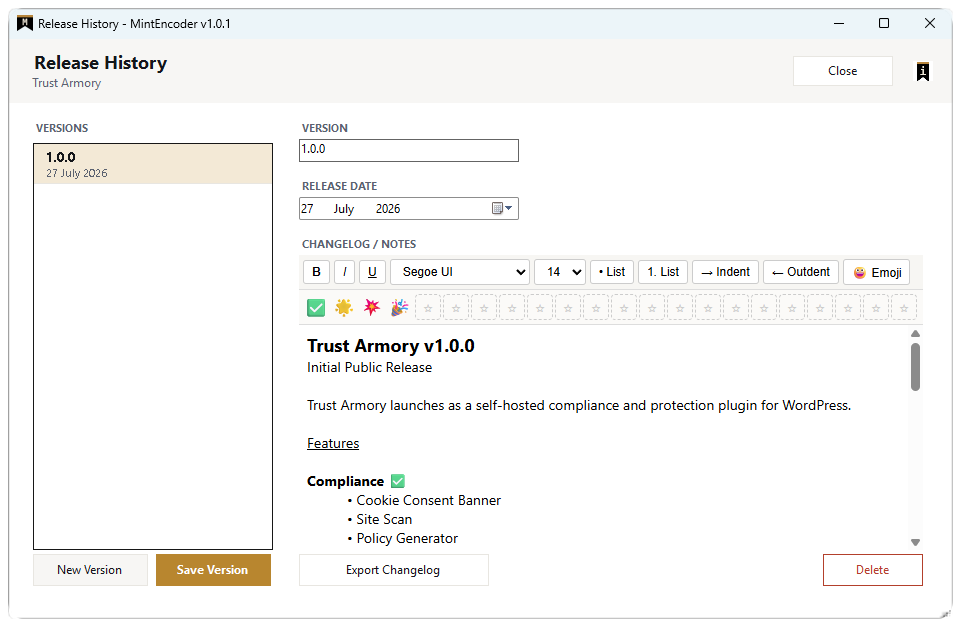
In this example, as this is our first product, the version number will be 1.0.0, but if there was an exisitng version, you would increment the version number based on the type of release, as explained above.
Release Notes
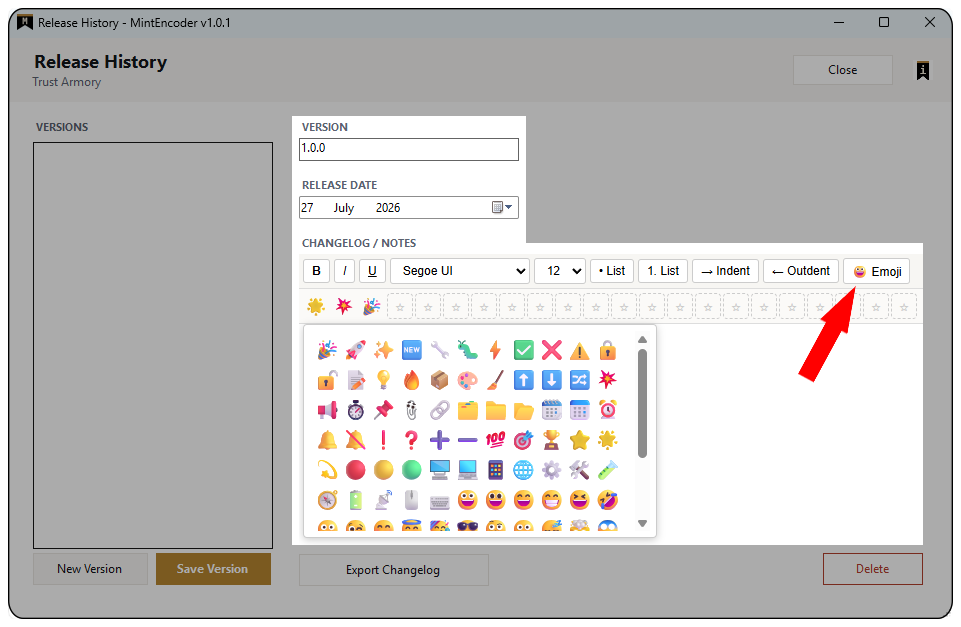
By clicking on the emoji button, a panel of 101 emojis are displayed. right click on favorite emojis to add them the emoji favorites toolbar for qucker access.
The rest of the features are what you would expect in any rich text editor.
By clicking on the emoji button, a panel of 101 emojis are displayed. right click on favorite emojis to add them the emoji favorites toolbar for qucker access.
The rest of the features are what you would expect in any rich text editor.
The versions are stacked in date order, with the more recent at the top. This is relevant because the top version (the latest release) is what the default selection will be when minting a licence in Licence Manger
Export Changelog will export all the releases listed in the version into a single JSON file. If you have updated in the notes panel, you must save for any changed to included in the exported file.
The JSON file will display emojis in thier text form (e.g. \uD83C\uDF1F) so its not as straight forward as copying and pasting them onto a webpage. The JSON file needs to be deserialized to display the emojis in their graphical form.
Key Manager
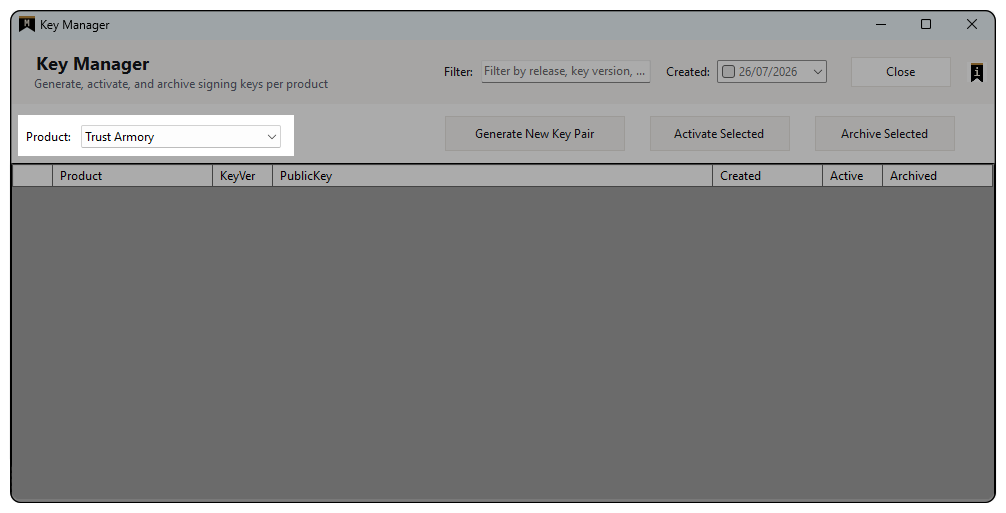
Product Selector
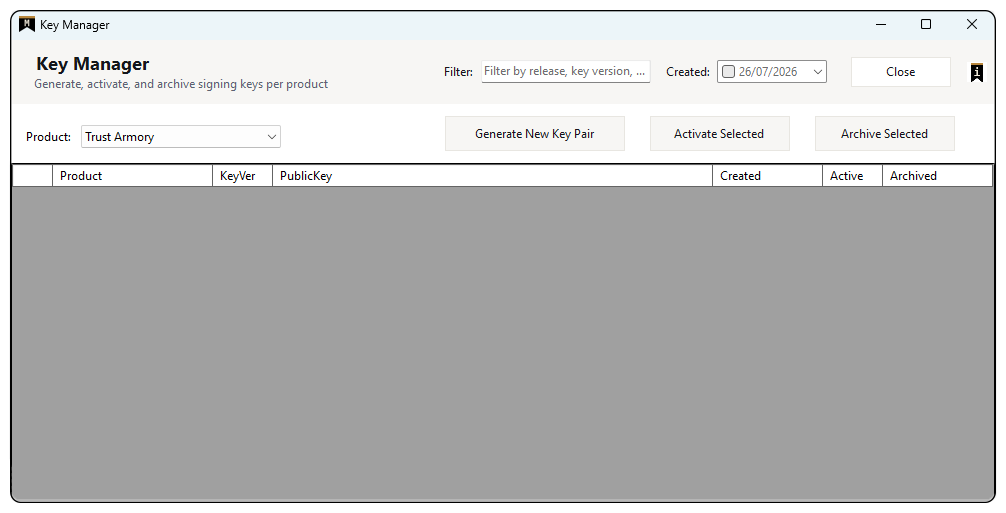
The Product selector lists all active products and determines which product’s signing keys are displayed and managed.
Whichever product is selected, that is the product the action buttons will take focus on. Selecting a product will also display all associated key pairs.
Tip: A product must exist before signing keys can be created, which is why Key Manager will disable if there are no active products.
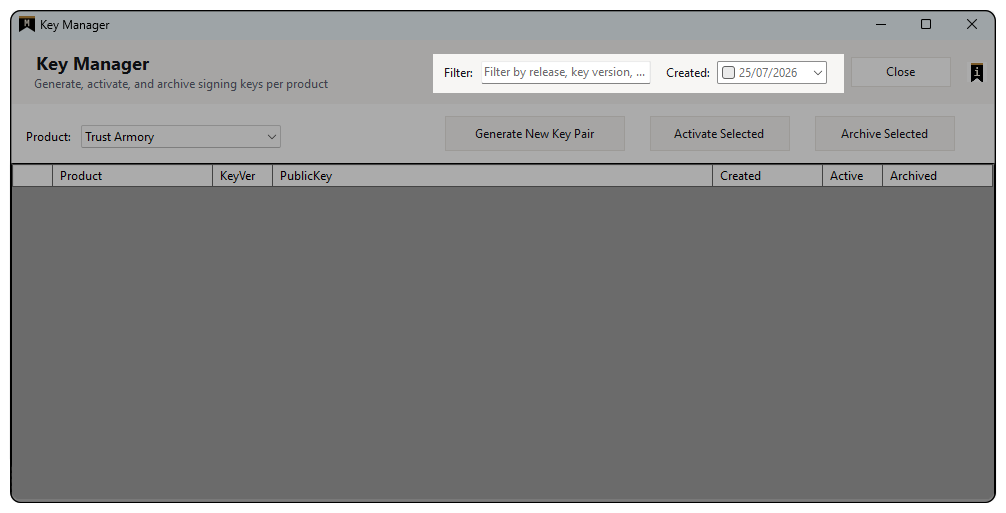
Filters
Overtime, many key paris will probably be generated for many products and to find anything will become a mission in itself. Use the dynamic search filter to help. Available filters include:
Text search
This includes any part of the Public Key
Release
Key Version
Creation Date
💡 Tip: While the created date is very specific, you can also use the search filter for dates using the following format: yyyy-mm-dd.
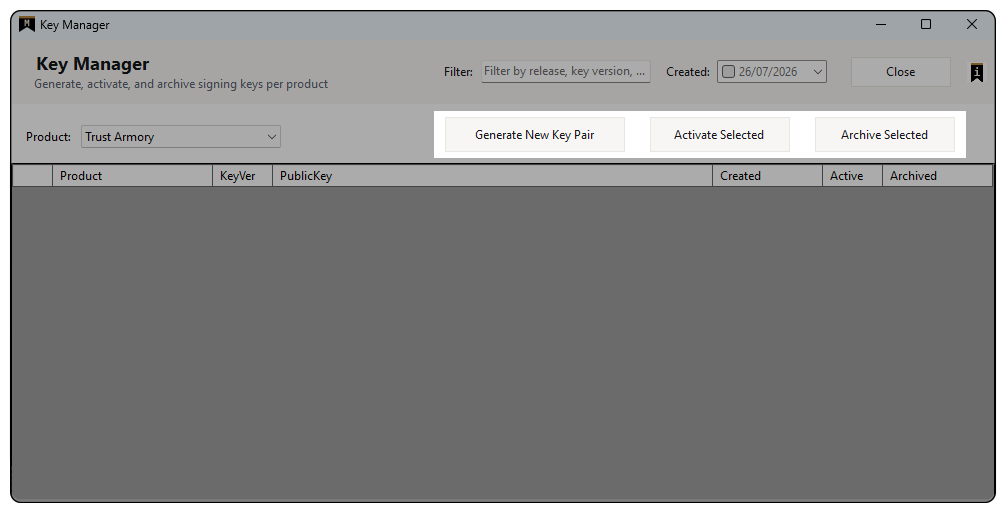
Action Buttons
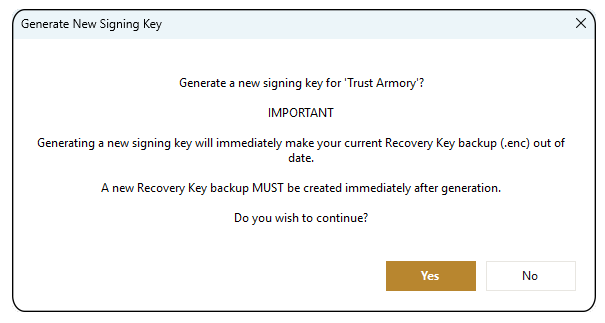
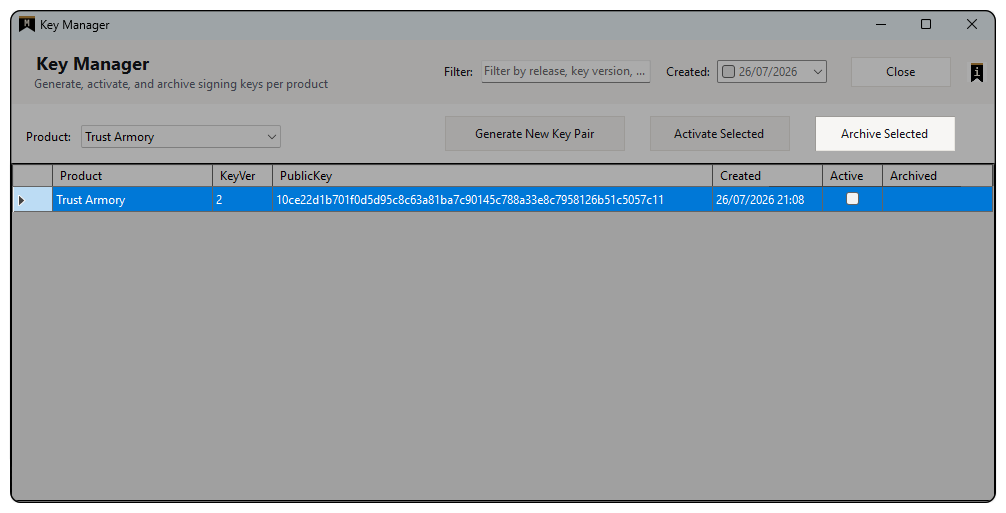
Generate New Key Pair
Creates a new public/private key pair for the selected product. The newly generated key pair is stored within MintEncoder and becomes available for activation.
Activate Selected
Marks the selected key pair as active.
Each product can only have one key pair active at any given time.
Archive Selected
Archives the selected key pair.
Archived keys are retained for historical reference and cannot be deleted and cannot be used to sign newly issued licences.
However, existing licences signed with that old key remain valid until you relase a version omitting the older key, via your key roatation process..
We reccommend to archive a key only after a replacement key has been generated and activated.
💡 Tip: In the event of a disaster, recovery is only as good as your last backup.
Signing Key Management
💡 Tip: Only 1 pair can be active for a single product at any time.
Licence Manager
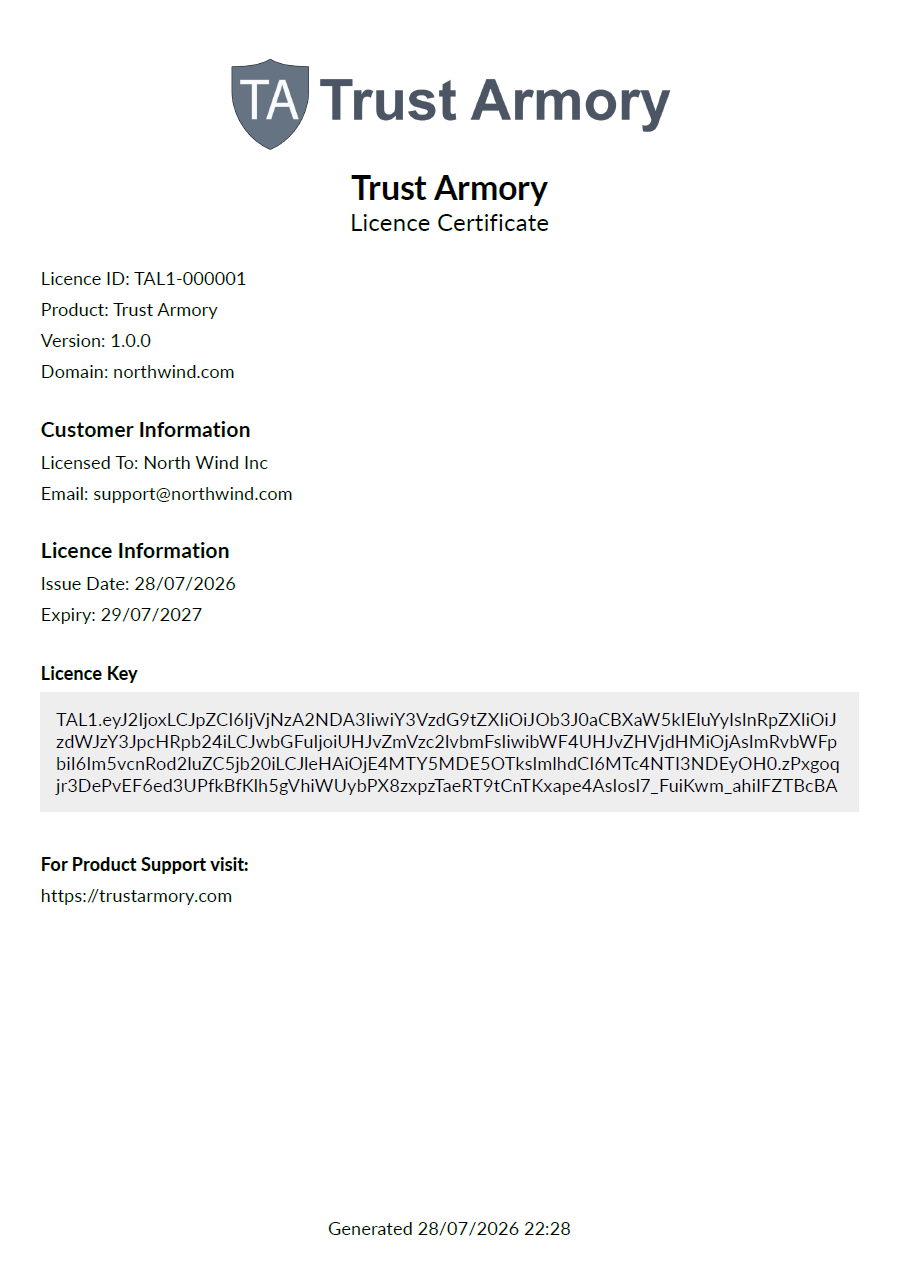
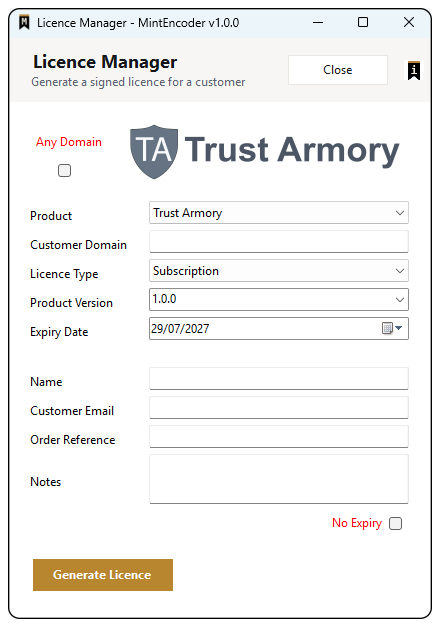
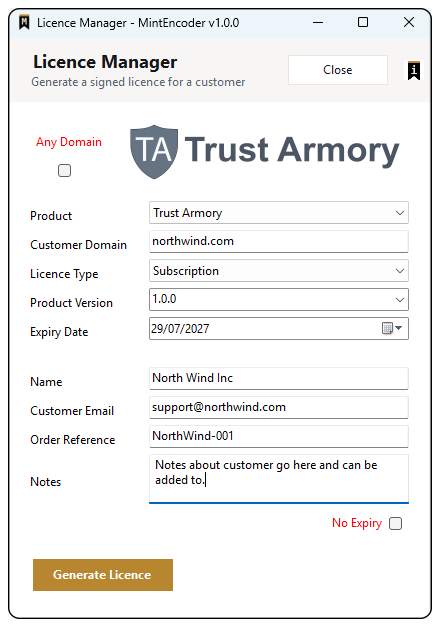
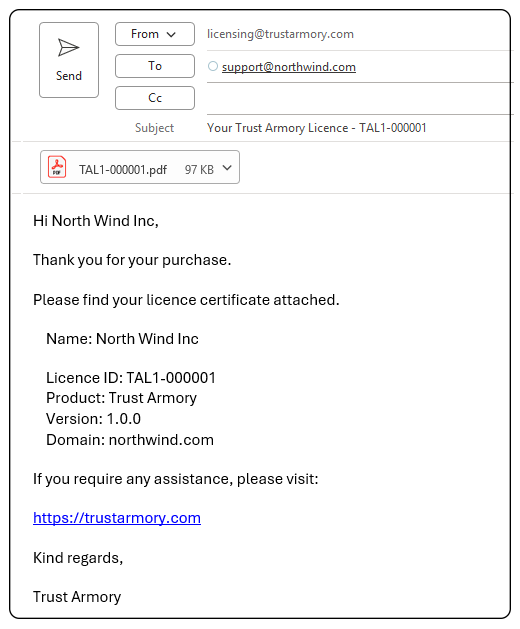
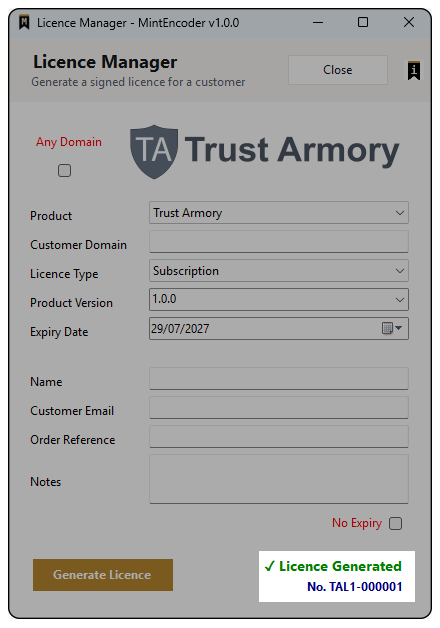
Most of these elements will be stamped onto the minted licence, which is emailed to the customer along with the product activation key as a PDF certificate.
The Product
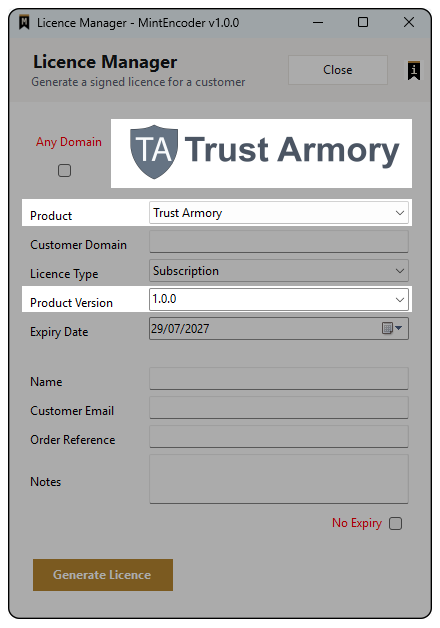
The Product dropdown list is a live representation of all active products. By selecting the product here, the correct product key, Logo Preview are automatically engaged and the Product Version list is populated with all versions of that product, with the most recent being selected by default.
The logo displayed in Licence Manager is taken from Product Manager. If the product uses a custom logo, that logo is displayed. If the product is configured to use its Product Name instead, MintEncoder dynamically generates a substitute image using the product’s configured branding settings as defined in Product Manager.
The Licence Model
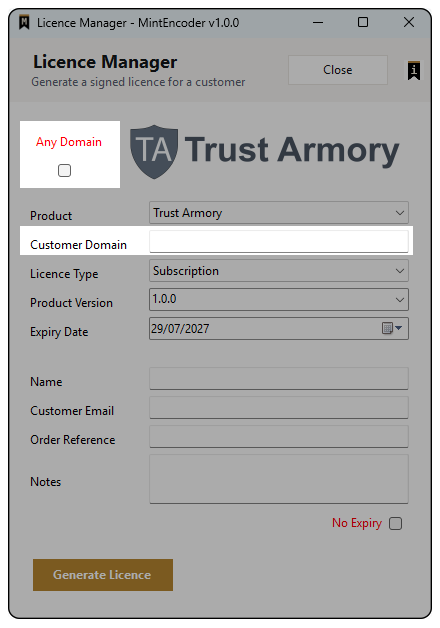
The “Any Domain” and “Customer Domain” controls will be disabled if the Product is set set to “Seat Based” in the Product Manager.
For “Domain Based” products, the Customer Domain field is mandatory and will be converted to lower case text.
Domain Based products will only validate against the domain name specified in this field, unless the “Any Domain” is checked, in which case, the Customer Domain field is disabled.
Domain Based licences are intended to operate against a single customer domain. If a customer requires licensing for multiple domains, separate licences should normally be issued for each domain.
Because issued licences cannot be edited retrospectively, care should be taken to enter the correct domain before generating the licence.
Licence Type
Subscription
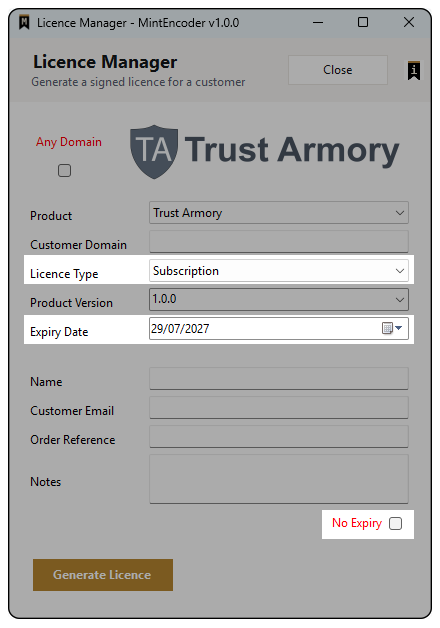
Subscription licences are typically issued for 12 months, although the actual duration is determined entirely by the selected Expiry Date.
Trial
Trial licences function identically to Subscription licences but are normally issued for evaluation purposes. New trials default to 7 days, although the duration can be adjusted using the Expiry Date field.
USE WITH CAUTION
Selecting No Expiry creates a perpetual licence that ignores the Expiry Date field.
A perpetual licence remains valid until the Public Key used to sign it is removed from a future release. Once a licence has been issued, its expiry behaviour cannot be changed retrospectively.
Before issuing a perpetual licence, ensure this is the intended licensing model for the customer.
Perpetual licences can only be retired by publishing a new release that no longer trusts the Public Key used to issue them.
If a perpetual licence is issued accidentally, the licence itself cannot be edited, revoked, or converted back to a subscription. The only remedy is to distribute a future release that no longer includes the issuing Public Key.
Create Email Draft - Requires Microsoft Outlook
An email draft is automatically created and opened for review before sending.
The send from will be set to whatever the Product Manager has set in the Licensing Email field. (assuming that the local Outlook has them same email account setup)
You can define the email signature the usual way.
PDF Certificate Attachment
The PDF certificate is generated on demand and attached to the email draft. Once sent, the certificate is not retained by MintEncoder and can be regenerated at any time from Licence Log.
The certificate contains the same customer, product, licence, and subscription information that was entered during the licence generation process.
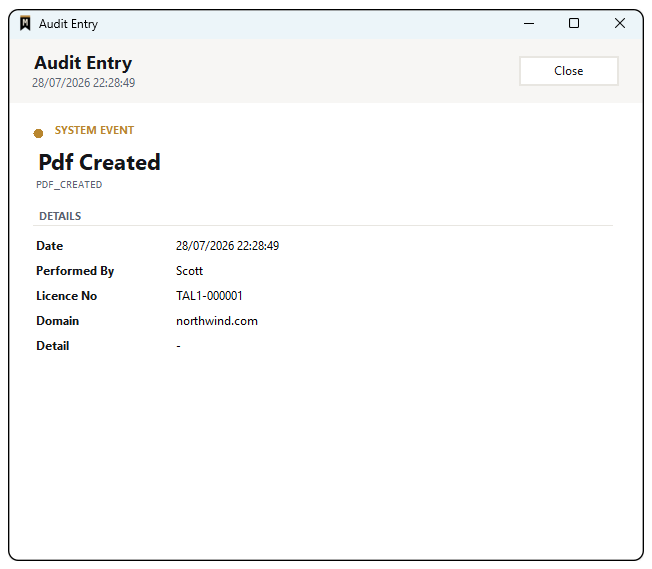
Licence Log and Audit Log serve different purposes whereas Licence Log records the details of issued licences., while Audit Log records the actions performed within MintEncoder, including the creation of those licences.
Licence Log
The Licence Log button will remain disabled until a licence has been minted, beacuse there is nothing in the table.
Licence Log
Licence Log is a complete, searchable record of every licence you’ve ever issued, and it’s usually the first place to look during a support call. Type into Search and the list narrows as you go, matching across licence fields; tick the Created checkbox if you want to narrow it further to a specific date. The grid shows ID, Domain, Customer, Product, Created, Expiry, Status, and Created By – click any column header to sort by it, and click again to reverse the order.
Double-click any row – or click the licence number link that appears right after a successful mint in Licence Manager – and you’re taken to that licence’s full details: customer information, the licence key itself (with a one-click Copy button), subscription dates, and a Notes field you can edit in place by clicking Edit Notes, which turns the box editable until you click Save Notes to commit it. Try to close that window with an edit still in progress and MintEncoder asks first, rather than losing it silently.
Back in the main list, Make PDF works on whatever you’ve selected – one licence opens its certificate immediately, several generate the whole batch into a folder and open that instead. Export CSV exports the results of your current search (not just what’s visible on screen) and opens Explorer with the file ready to hand off.
Settings
Settings is split into eight tabs, and between them they cover most of what determines whether MintEncoder can keep issuing valid licences.
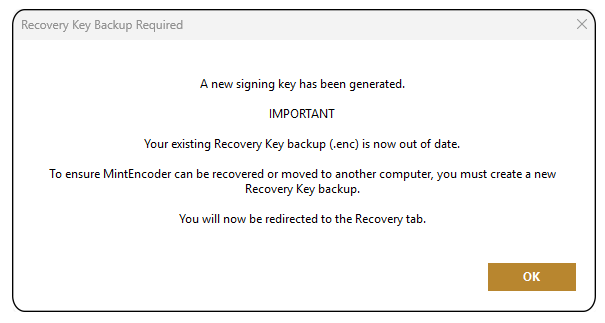
Subscription is your own MintEncoder licence – not anything you issue to customers – showing your plan, status, and expiry. Backup and Auto Backup handle manual and scheduled copies of your products, keys, and licences; enable Auto Backup and MintEncoder checks once a minute whether a scheduled backup is due, writing to up to two separate folders you choose. Recovery is where you manage the Recovery Key (.enc) – the file that lets you restore MintEncoder after a failure or move it to a new computer entirely. Keep it somewhere separate from your regular backups, and get in the habit of exporting a fresh one every time you generate a new signing key.
Version Control shows MintEncoder’s own version and changelog, not your products’ – that lives in Product Manager instead. Audit is a full log of every significant action taken in the app, searchable and exportable, with each entry opening to its own detail view if you need to dig further. And System covers default folder locations, plus the Administrator Lock.
The Administrator Lock lets you protect Backup, Auto Backup, Recovery, System, and Key Manager’s signing-key actions behind a single password, while leaving them visible to everyone – day-to-day work like minting licences, browsing products, and reading the Audit tab is never affected. Setting it up means entering a Recovery Email (typed twice, to catch mistakes) and choosing a password; MintEncoder immediately emails a confirmation link to that address, and the lock genuinely won’t activate until that link has been clicked and the code on the resulting page pasted back in. That’s deliberate – a mistyped or undeliverable Recovery Email should never be able to lock everyone out with no way back in. If the password is later forgotten, \”Forgot password?\” on the unlock prompt gets a fresh recovery code emailed to that same confirmed address; if even that address becomes unreachable, contacting MintEncoder support is the last resort.
Section: “What if I forget the administrator password?”
System Configuration is protected so that day-to-day licence minting stays open to your whole team, while the sensitive settings — backups, recovery, signing keys — stay locked to whoever set the administrator password.
If you forget that password but still have access to your Recovery Email, you’re fully self-service: click “Forgot password?” on the unlock prompt, and a code arrives in your inbox to reset it — no need to contact us.
If Recovery Email isn’t set up yet, or you need access to System Configuration itself (not just the admin password — this is the “engine room” panel with backups, recovery, and signing keys), tick the System Configuration checkbox in Settings → System. You’ll see an 8-character challenge code — contact MintEncoder support and read it to us. We’ll email an unlock code to the address on file for your subscription; paste it in when it arrives to reveal the “Disable Administrator Lock” button.
💡 Tip: Keep your Recovery Email current. If the address on file is ever closed or unreachable, we have a manual fallback, but it requires extra identity verification on the call and takes longer than the usual automatic email.
Title Here
Description